---
title: "Export and slideshows"
description: "In the browser editor: set up and run renders in the Renders panel, and build a navigable slideshow."
sidebarTitle: "Export and slideshows"
---
**Export** in the header starts a render straight away, with the settings in the **Renders** panel on the right. So
set those first.
 ## Set up the file
| Setting | Choose |
| --- | --- |
| **Format** | **MP4** for sharing and uploading; **WebM** for the web and transparent overlays; **MOV** (ProRes) when another editor needs a high-quality master |
| **Resolution** | **Auto** keeps the project's size. Bigger renders are slower and don't sharpen low-resolution footage |
| **Frame rate** | 30 unless the destination or the footage needs 24 or 60 |
| **Quality** | Hidden for MOV, which always uses ProRes quality |
| **Use GPU encoding** | Faster on machines that support it |
**About video formats**, next to the settings, explains the choices.
## The render queue
Each export becomes a row in **Renders**, with its progress. Cancel a running one, download or delete a finished
one, and **Hide finished** to tidy the list without deleting files.
Before sending: open the file itself, watch the start and the end, check captions, cuts and sound at the busiest
moment, and give it a name that says which version it is. If a render fails, keep the error and see
[troubleshooting](/help#in-the-preview-and-browser-editor).
## Build a slideshow
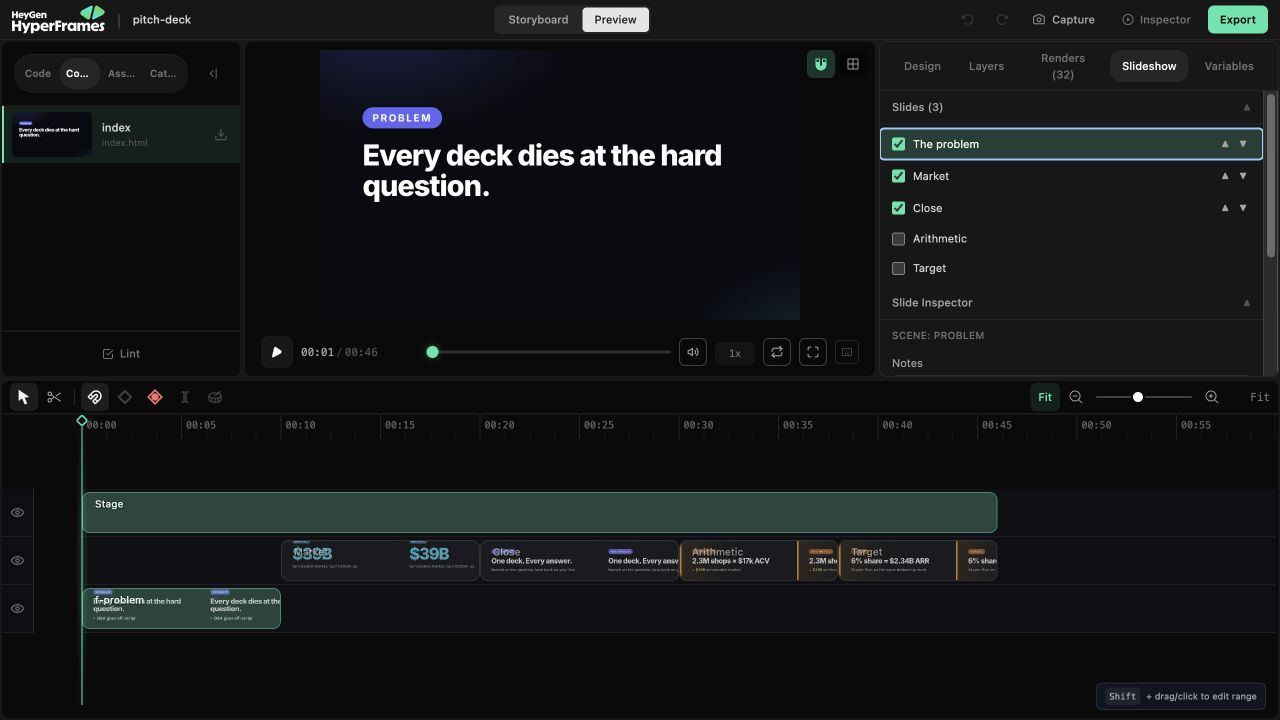
A slideshow is a live, navigable presentation—not one linear video. The **Slideshow** tab appears when the active composition contains a HyperFrames slideshow manifest.
 ### Build the main path
Start with the route everyone should see:
1. In **Slides**, check the scenes that belong in the main presentation.
2. Use the arrows to put them in order.
3. Select each slide and confirm that it makes one complete point.
4. In **Slide Inspector**, add speaker notes that help the presenter rather than repeat the slide.
The browser editor saves slideshow changes into the project’s manifest. Notes save after a short pause; other edits save immediately and participate in project history.
### Add fragment reveals
Move the playhead to the moment when the presentation should pause, then click **Mark** in Slide Inspector. That time becomes a fragment hold-point for the selected slide.
Use fragments when the presenter needs to reveal part of an idea before advancing. A slide does not need a hold-point for every bullet.
### Add an optional path
Branches keep optional detail outside the main story:
1. Open **Branches**, name a branch, and assign its slides.
2. On the slide where the choice appears, select the visible button or object on the canvas.
3. Open **Hotspot Tool**, choose the target branch, add a useful label, and click **Make hotspot**.
4. Keep a clear route back to the main story.
Deleting a branch removes that branch definition and every hotspot that points to it, so the browser editor asks for confirmation first. The source scenes remain in the project.
### Test it as a presentation
Run the presenter locally:
```bash
npx hyperframes present
```
Test next and previous navigation, every fragment, every hotspot, every branch, and the return path. Click **Present** or press **P** to open the synchronized audience view.
A slideshow stays interactive. If the result should simply play from beginning to end as an MP4,
use a [video workflow](/workflows) instead.
To create the deck with an agent before refining it here, follow [Make an interactive presentation with AI](/guides/slideshow).
## Related topics
- [Render from the command line](/guides/rendering)
- [Finish, render and share](/guides/export-and-share)
- [Make an interactive presentation with AI](/guides/slideshow)
- [Use variables and templates](/studio/assets-and-blocks#use-variables)
- [Work with source and an agent](/studio/canvas#edit-the-source)